Wednesday, January 7, 2015

Chesapeake 17 - epoxying the butt joint - January 7, 2015

This evening I only had time to join two of the panels with a butt joint. This means simply to butt the two ends of the blanks together and then use epoxy and a piece of fiberglass tape to glue them together.

A note about epoxy, it likes warm temperatures, 70 to 75 degrees is ideal. Geiger's boat shop is a basement that in the winter is between 50 and 60 degrees. I keep the epoxy containers in the bath room which is one of the warmest rooms in the house, this makes it easy to pump and mix the epoxy.

At right is the epoxy resin and hardener containers in the bathroom. I use and recommend Mas no blush, slow cure marine epoxy.


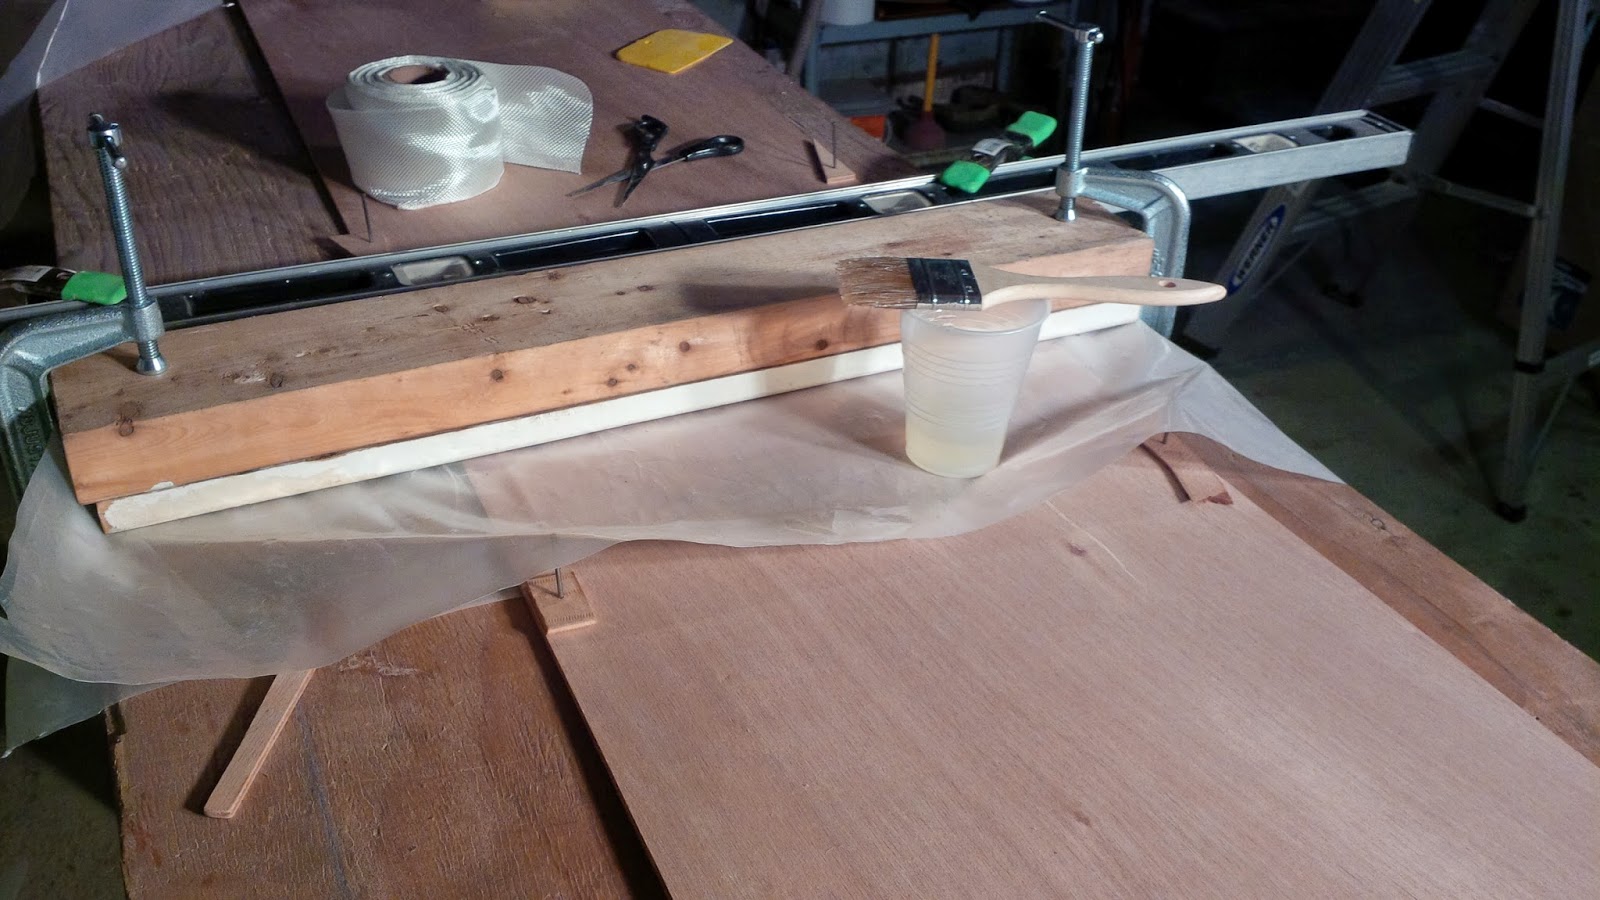
Below are all the tools and supplies I needed to create the butt joint.
I nailed the two blanks in place with finish nails and cut my fiber class tape to length. Notice the sheet of plastic under the butt joint. The plastic is needed to keep the joint from being glued to the table. A sharp pair of scissors is an important tool to have when working with fiberglass tape and fiberglass cloth. 


Above is the mixed up epoxy and a 2 inch chip brush I used to apply the epoxy. The pumps on the epoxy containers are calibrated so that for every pump of resin you need a pump of hardener. For this batch I used five pumps of each which was way to much. When I do the butt joints for the other blanks I'll only use three pumps of each, hardener and resin and I hope to use it all and not have any left over.


In the picture above the fiberglass tape has been thoroughly saturated. You can tell it's saturated when it turns from white to clear. You only want to use just enough epoxy to turn the fiberglass clear. If you use too much the fiberglass will float and you will not get as strong a bond between the okoume and the fiberglass. 
To finish up I put another sheet of clear plastic over the saturated fiberglass tape and then clamped the joint under a couple of boards so it will set up flat. Looking at the cup of epoxy it hardly looks like I used any.  Time spent today was about 30 minutes.

Tuesday, January 6, 2015

Chesapeake 17 - cutting blanks from 4 mm okoume plywood - January 6, 2015

This evening I cut two of the 4x8 sheets of okoume plywood into the blanks indicated in the plan. These blanks will be glued together with fiberglass tape and epoxy and then I'll layout the pattern for the side and bottom panels on them.

I used the pine board I'll be using to make my sheer clamps as a guide and held it in place with a spring clamp on each end. Then adjusting my skill saw blade to be just a quarter inch deeper then the thickness of the two sheets of okoume I made the cuts. I had both sheets clamped together so I would only have to make three cuts instead of six.


I have already cut one of the blanks in the photo above, in the photo on the right the last cut is read to be made. Three of the blanks are eleven inches wide and the last one is the remainder of the sheet about fifteen inches.

Next time I get into the shop I'll glue the blanks together with a butt joint. The plans call for a scarf joint but I saw a video from Pigmy Boats, another company that sells kayaks in kit form, and in the video they said the butt joint will work quite well. I have used these in the past with excellent results.

Monday, January 5, 2015

Chesapeake 17 January 5, 2015

I did not have a lot of time today so I just marked the okoume according to the plans. I used blue masking tape so it would be easy to see where the lines are drawn.  I'll cut these out with my skill saw next time.


It took about 30 minutes to but on the tape and mark the lines. I used a sheetrock or dry wall T-square to aide in making the lines straight and parallel to the long edge of the okoume.

Sunday, January 4, 2015

CLC Chesapeake 17 Kayak January 4, 2015

Welcome to Geiger's Boat Shop,  I'm Brian Geiger and over the next four to five months I'm going to build a Chesapeake Light Craft (CLC) Chesapeake 17 kayak, designed by John Harris.

I'll be building the boat from plans, it's available as a kit from CLC but I really want to build this one for plans. 


I built this CLC WoodDuck 12 kayak back in 2012 from a kit so now it's time to build a boat from plans.


Below is a picture of all the materials needed to make the kayak. The 4 X 8 sheets of 4 millimeter okoume which will be used to make the hull and deck. The 10' white pine board which will be ripped on the table saw to make the sheer clamps. The epoxy, wood flour, and fiberglass tape will be used to smooth and cover the hull seams. The fiberglass cloth will be used to cover and strengthen the deck and hull. The back band, closed cell foam and adjustable foot-braces will be use to trim out and complete the boat. The copper wire will hold the boat together while the epoxy sets up and the ring nails will hold the deck in place as the epoxy sets up.

All kinds of claps are needed during the construction. Below are a bunch of 4"  C-clamps.


Here are two dozen spring clamps.

When you build a kayak you also need some consumables. Plastic gloves to keep the epoxy from getting on your hands, containers in which to mix the epoxy, spreaders to spread the epoxy to saturate the fiberglass and assorted chip and foam brushes to apply epoxy or to apply varnish.  Sand paper in 80, 120, 160, and 220 grit will be needed to sand the boat numerous times. You will also want some 320 or 400 grit wet sand paper for sanding between coats of varnish when finishing the boat.